If you are a person having a gun, this is important to keep safe your gun all the way. Either you buy it or build it at home, it does not matter but you must have one as a precaution. However, this article will lead you to detail of how to build a gun safe and I expect you to try it by yourself according to the time you can manage so far.
In This Article
How to Build a Gun Safe Step by Step
01. Plan First
If almost all the family members are using guns, then you definitely need a gun safe to keep the weapons secured or just prevent them from misusing. However, first of all, you have to go to a plan on which you will be able to build a gun safe.
02. Building The Main Frame
The gun safe size is quite your choice. According to the volume of guns, you can plan a safe or downsize or a larger one. The piece you need either is wooden or an iron sheet is 2X 4s. For a standard height of the safe, I used 2”x4”x6’s that were ripping down the center measuring 1.5”x1.25” facing the side so far. I trimmed them into pieces at the overall height of just about 56”. I also used a 2×4 cut 13” that was long laying flat on the point of the basement and the other was vertical on the top. Just repeat for the other side as the thing is the same. Both sides were connected to 19”, 2x4s sitting vertical position.
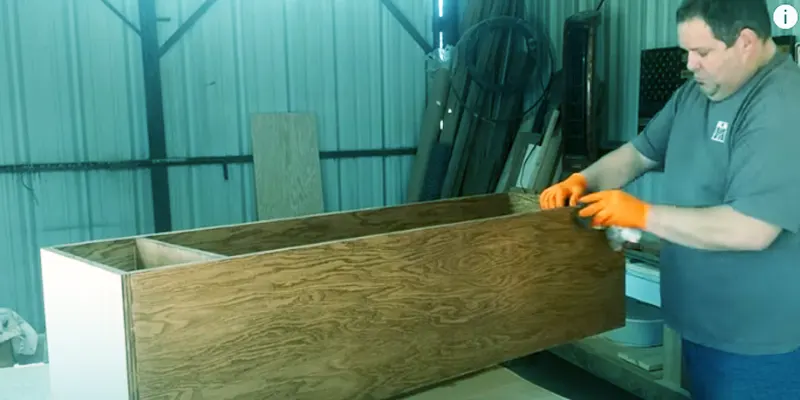
03. Attach The Back
Now back pieces that I cut to cover the whole surface of the gun safe. You can order for cutting if you are ready to build it with an iron sheet. My plywood plan was measured 44”x44”. So do for iron sheet also. The several sizes were 22”x44” and the other was 22”x12” for the back panel of a gun safe. Your project will determine the measurement of cutting the panel.
04. Adding The Wall
A welding worker will do the thing in case of making a gun with the plane sheet. Not similar to the back facing, the wall of the gun safe will mount inside. This is a reason, the frame base should be cut after measuring the overall size of the safe. I have taken a measurement according to the size of the gun safe. You will surely do it with the direct involvement of making a small gun safe as well.
05. Drop in The Bottom
The bottom of the safe needs a rest that was 2x4s a clear laying flat on the frame we already have made properly. The super and simple got screws too tight well. But iron safe needs to weld well. Here, your option will enhance your working style.
06. Set The Drop on The Top
The top of the gun safe is just a square or rectangular size. It generally rests on the wall side. Therefore, for plywood, I tightly screwed it into the frame for good support. It prevents the shaking of the gun safe. This was just light in weight but the help of dust out the safe.
07. Setting The Side Pieces
A workshop workout may require your gun safe if you take it with an iron or a plane sheet. I did it for my plywood using screw-in covering the joints of the plywood side. This is easy as you already have got everything prepared to build a gun safe.
08. Interior Effect for How to Build a Gun Safe
Because it is gun safe. And you must have barrel rests inside the safe. I used a jigsaw to make it curved into 2x4s in size. For iron or steel material, the workshop will take responsibility according to a guideline on the size of barrel rests. Though at home, I myself handed the issue making standard and equal distance apart. You can opt for some selves as your choice. Otherwise, they both are not bad as well. From outside, I screwed the barrel rests and the selves were from inside the safe. We are getting to the completion of how to build your own gun safe step by step. So, this is nice to do.
09. Door Frame
In the middle of building a handgun safe or gun safe, I made a frame to attach the door. So, I designed it to measure the accurate position so that I could do it after almost everything was done. As per I previous plan I left the design for setting the door.
10. Setting The Door Covering
I made a channel to mount the door panel on the frame of the whole body of the gun safe. After taking a good measurement I cut the door according to the height, width, and thickness. I also cut the channel for the door hinges. It looks good when the door hinges are set in place. This was an interesting task in my life.
11. Putting Door Hinges for How to Build a Gun Safe
I put the door on the frame that was already made. I checked all around to be an even position. When I got everything going ok, just nailed down hinges on the sides of the door as per the frame. But for iron sheet safe, the door setting needs well welding to adjust with the locking system. For the plywood workout, it was easy for me to set it up well all the way.
12. Painting The Door
The door is ready but needs to prevent scratches or any other hit unconcerned. So, sanded it well and painted it for a long-life of the gun safe.
The End
However, you have got an idea of how to build a gun safe. The article will detail a basic conception of what one needs to do alone at home. So, reading the above information better tries to make a gun safe for you and your family members to keep the gun with them.
Also, if want to search for any kitchen faucet and plumbing information please go https://faucetmeaning.com